

Training load
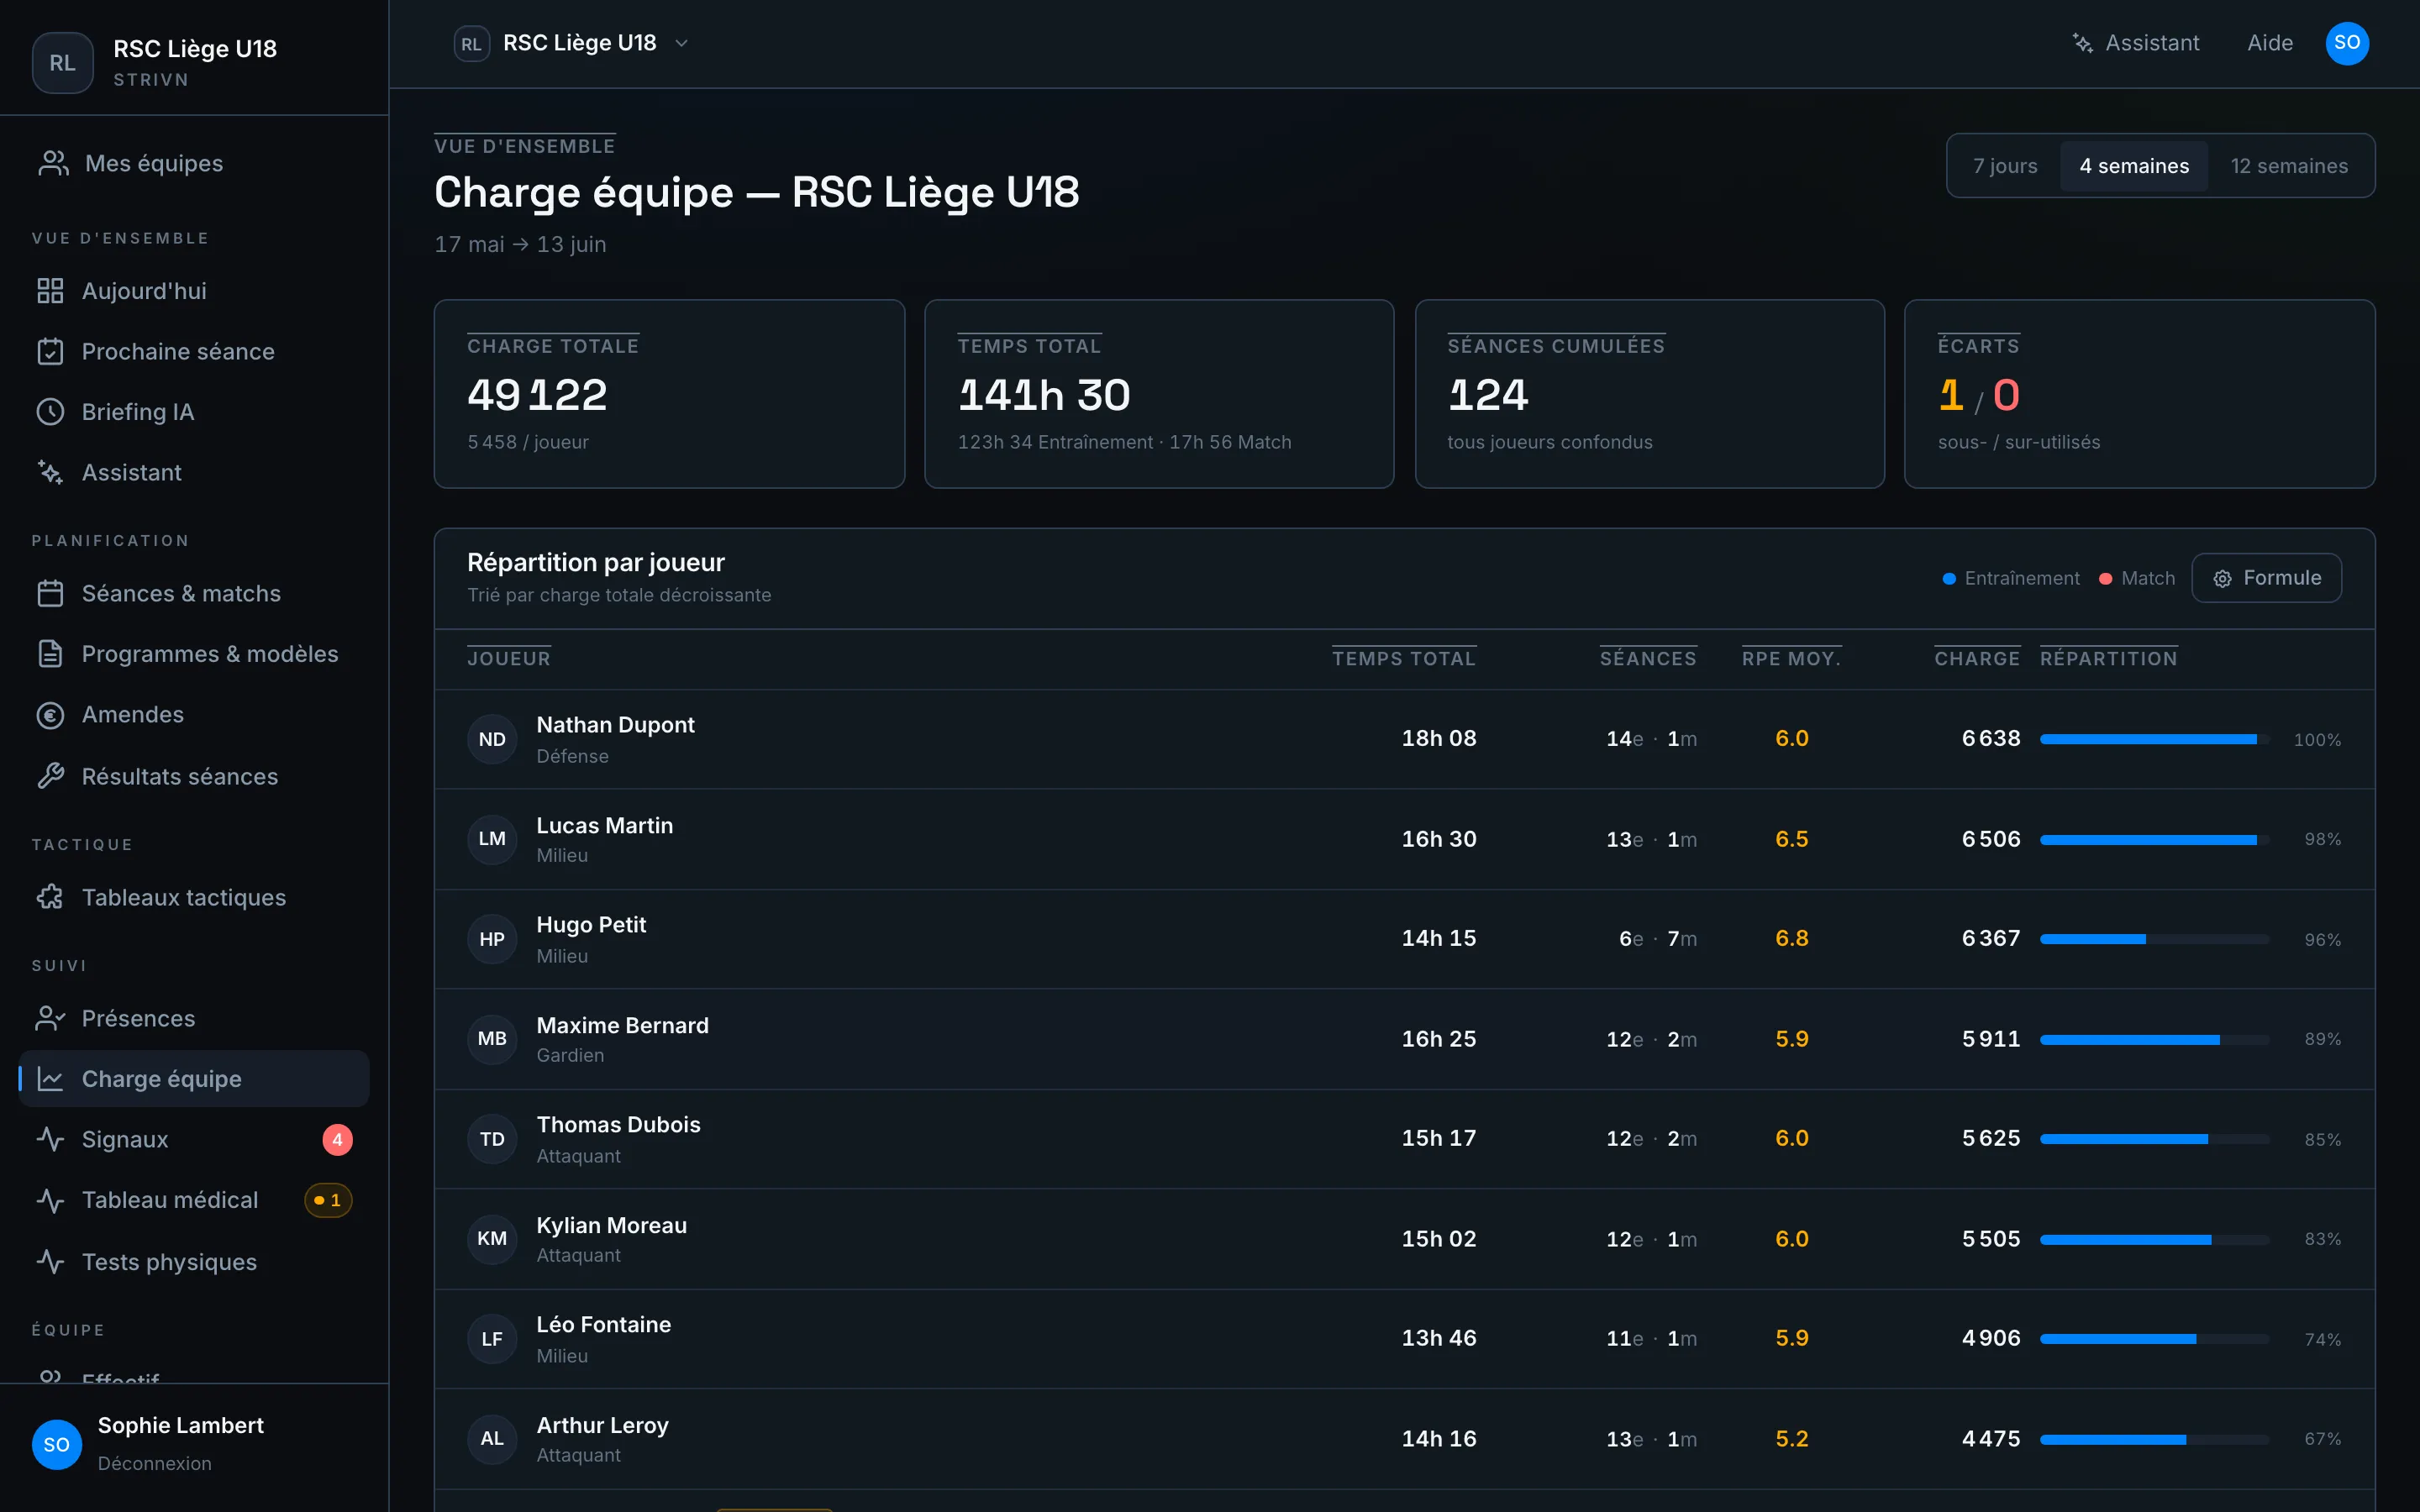
The Team load page sums up the training load of all your players over the chosen period. It relies on the sRPE model (RPE × duration): every session review feeds the calculation automatically.
Choose the period
Section titled “Choose the period”Top right, switch between 7 days, 4 weeks and 12 weeks. The date range adjusts and every value on the page is recalculated.
Reading the summary cards
Section titled “Reading the summary cards”| Card | Content |
|---|---|
| Total load | Sum of the load over the period, with the daily average |
| Total time | Cumulative hours, split between training and match |
| Cumulative sessions | Number of participations, all players combined |
| Outliers | Number of under-used / over-used players relative to the group |
Per-player breakdown
Section titled “Per-player breakdown”The table ranks players by descending total load. For each one:
- Total time spent in training and matches
- Sessions played
- Average RPE (perceived intensity)
- sRPE load and its distribution bar relative to the most-loaded player
Adjusting the sRPE formula
Section titled “Adjusting the sRPE formula”The Formula button opens the Load formula panel. By default, a match counts ×1.2 and a training session ×1.0.
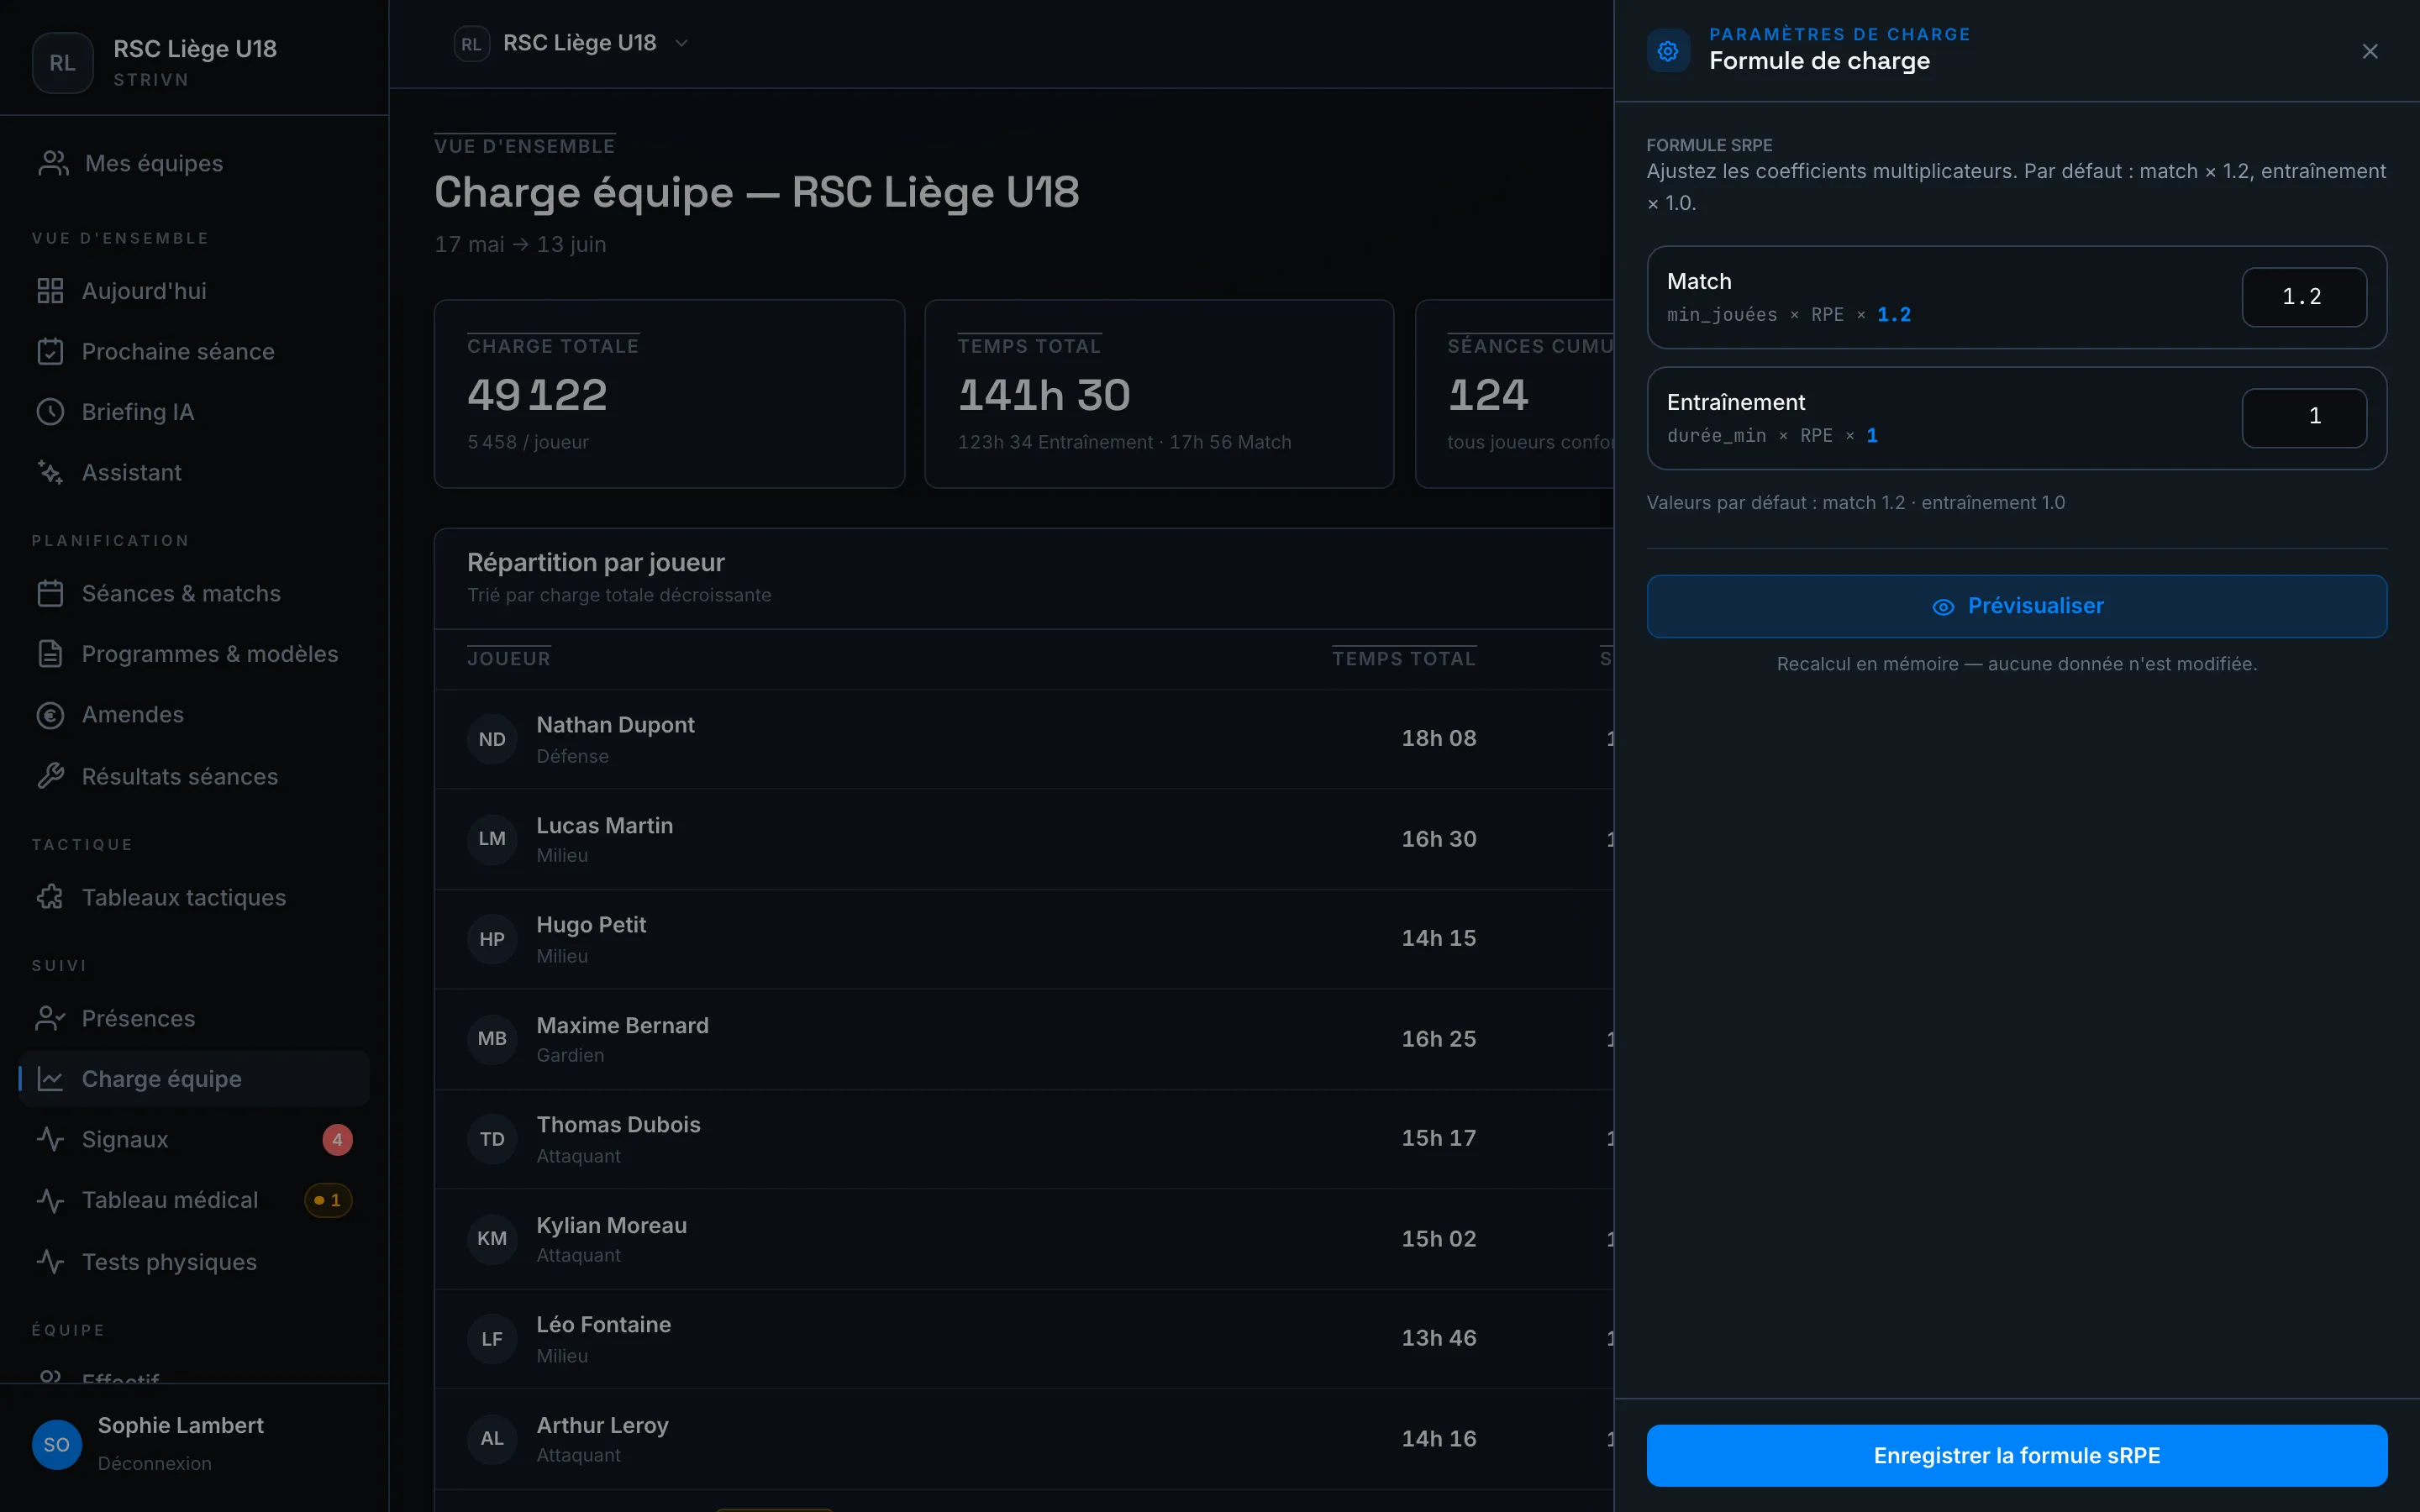
- Change the match and/or training multiplier.
- Click Preview to see the effect without saving anything.
- Confirm with Save load settings.
If the GPS module is enabled for your team, a second formula lets you weight imported GPS metrics.
Working in your own load unit
Section titled “Working in your own load unit”By default, load is shown in AU (arbitrary units): a 90-minute session at RPE 7 weighs 630 AU, and a week sits around 3,000. If your staff thinks in its own unit — a fixed multiple of the AU — declare it in the Load unit section of the same panel. The figures then come back onto a scale close to RPE, easier to compare and to announce.
| Field | What to enter |
|---|---|
| Unit name | The label shown everywhere instead of “AU” (16 characters max) |
| Worth in AU | How many AU one of your units is worth (between 0.01 and 2,000) |
Below both fields, a live example shows what a typical session becomes: 60 min at RPE 7 (420 AU) shows as "3.9 CU". Save with Save load settings.
Once the unit is set, every load screen switches to it: the Load page and its trends, load planning, planned vs actual, the season, the session timeline, camp reports, reports — and the player portal. Inputs follow too: your weekly targets and individual loads are typed directly in your unit.
Indicators that are ratios — ACWR, monotony, the internal / external load ratio — keep their original scale: they are calibrated ratios, not load quantities. Strain, on the other hand, follows your unit, because it is one.
Trends tab
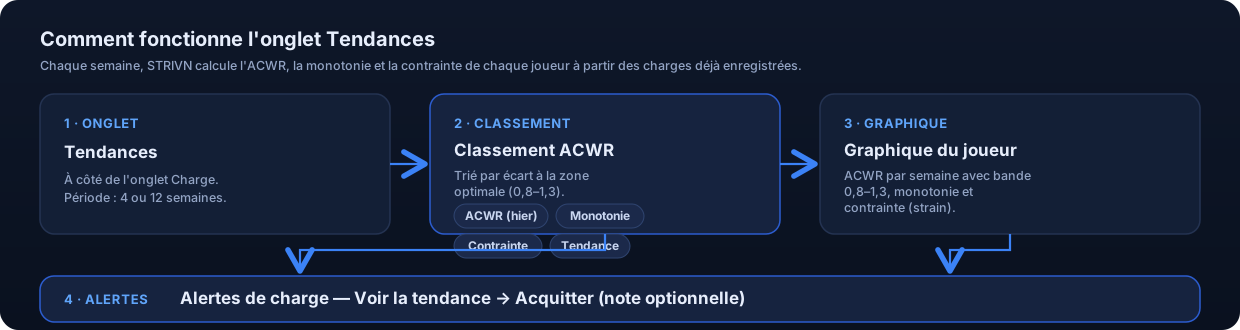
Section titled “Trends tab”Switch to the Trends tab (next to Load) to track ACWR over several weeks and process load alerts.
ACWR ranking
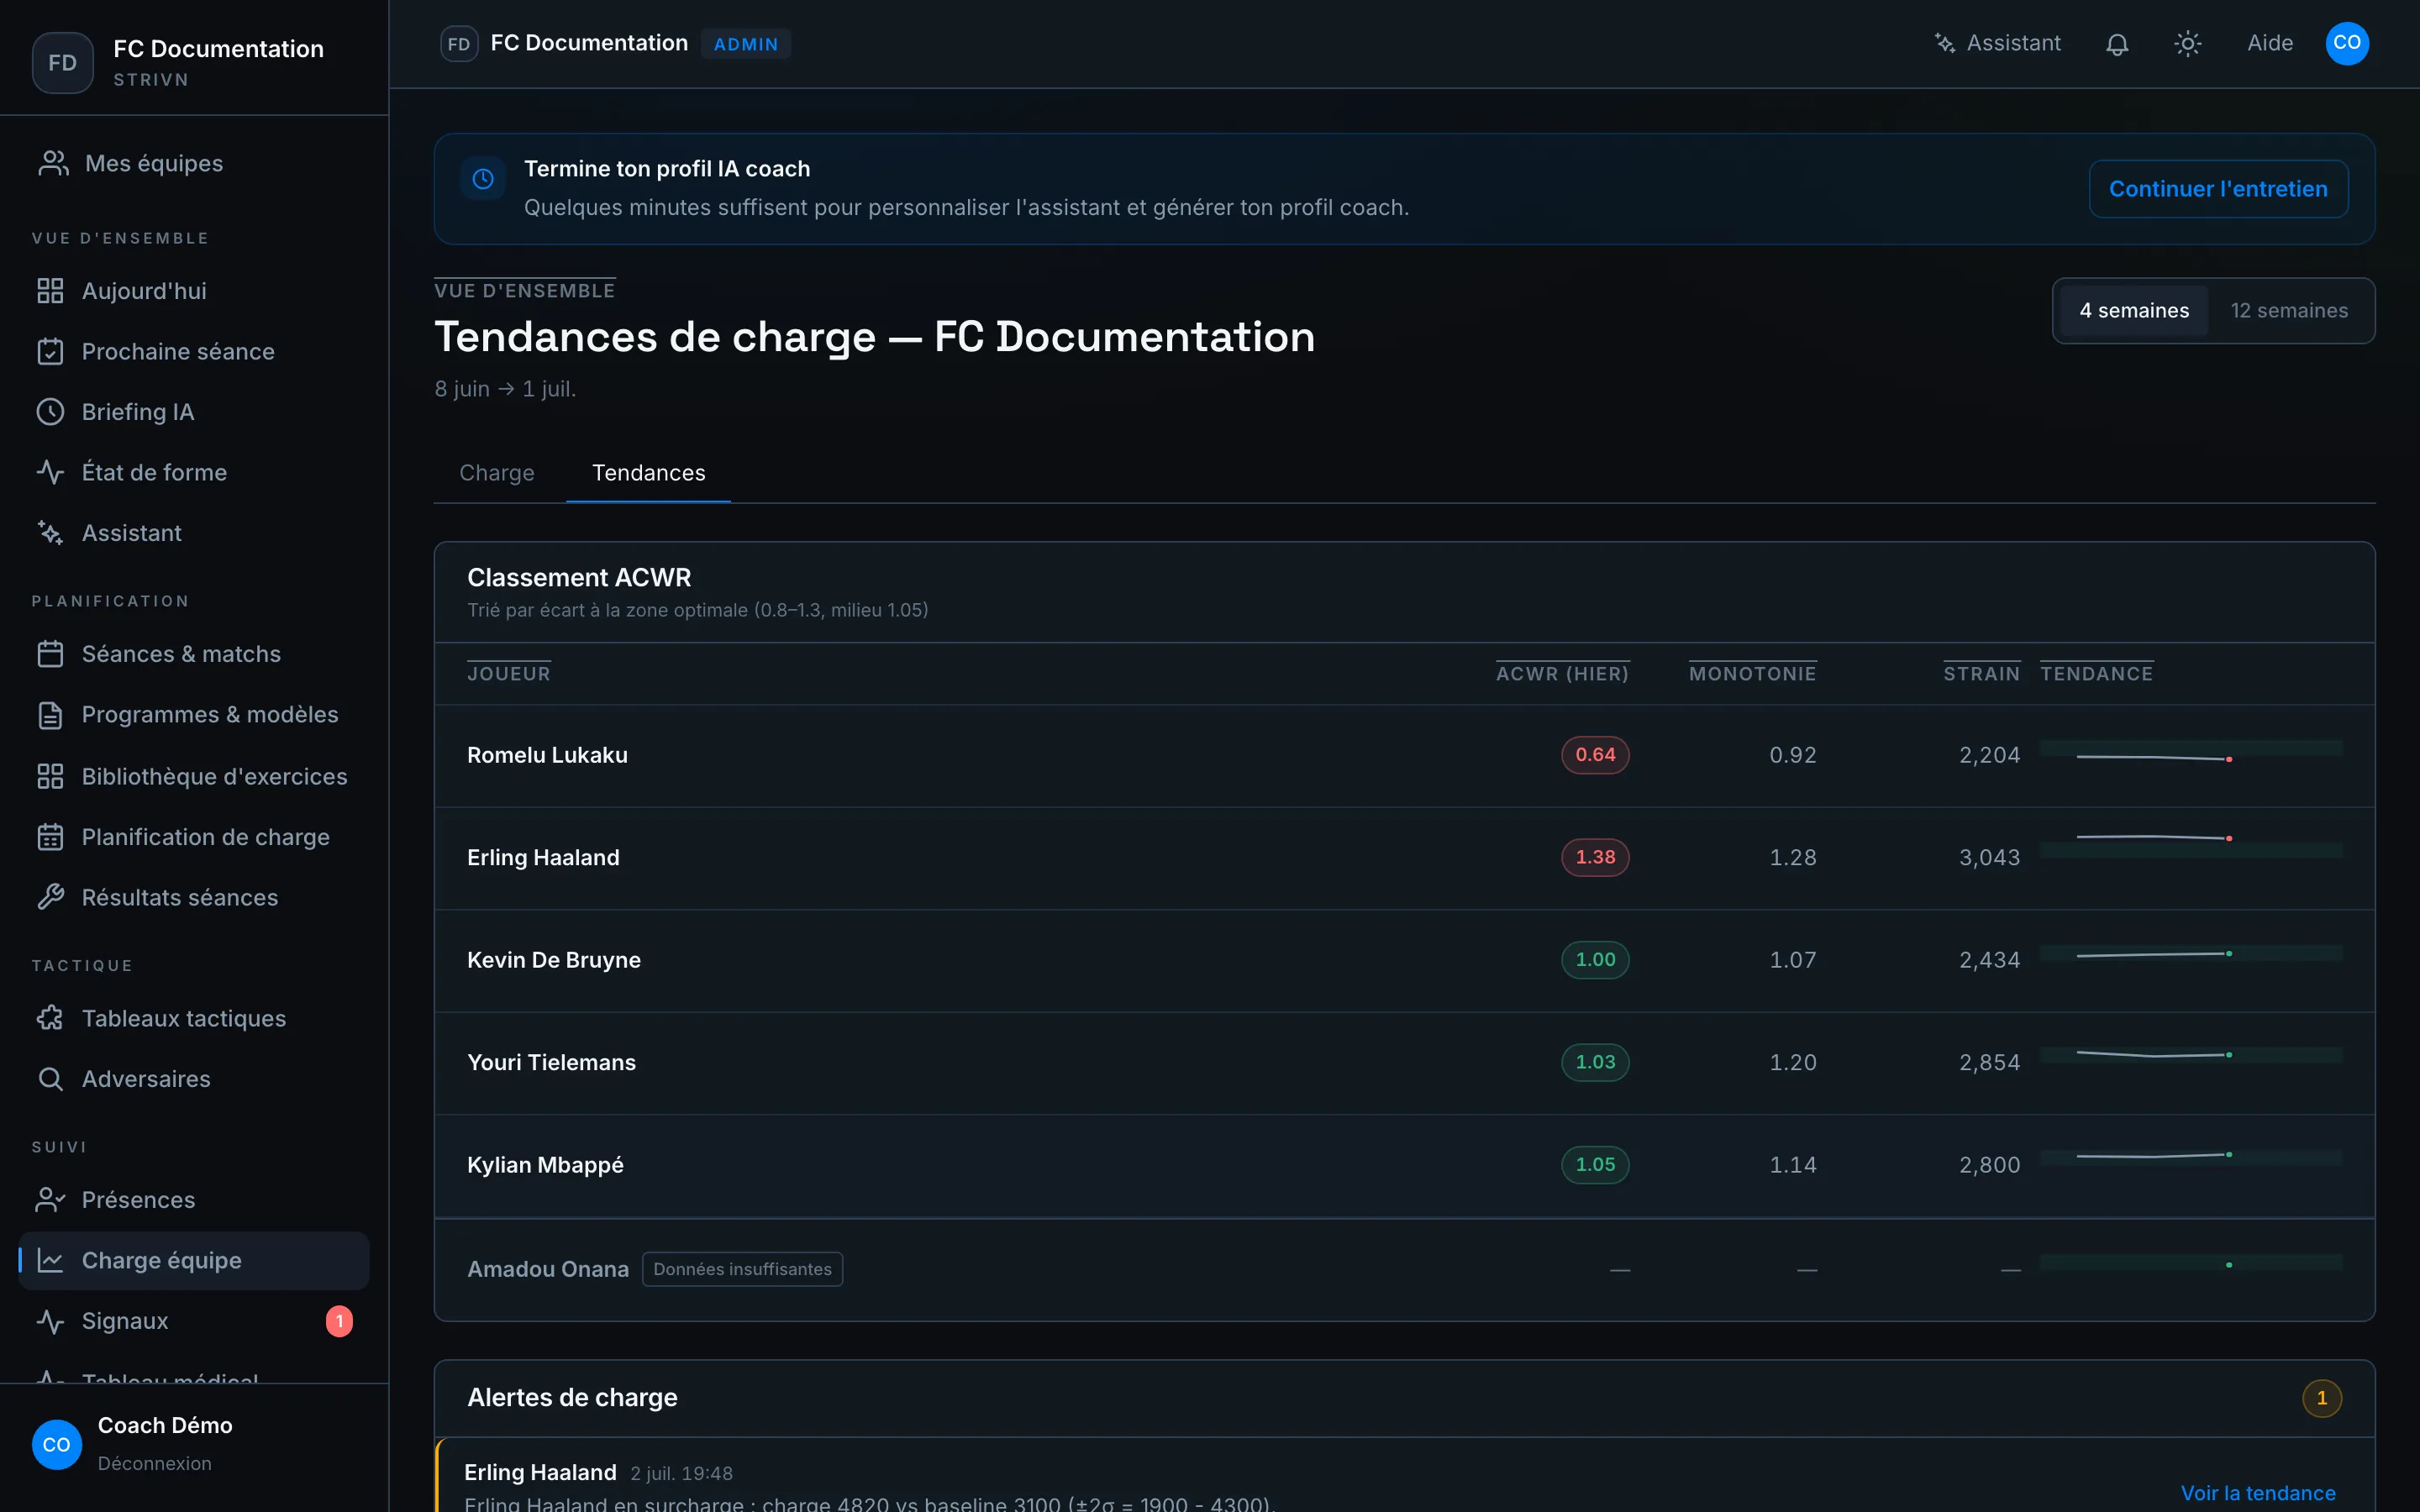
Section titled “ACWR ranking”The ACWR ranking table sorts players by distance from the optimal zone (0.8–1.3, midpoint 1.05) — those furthest from it appear first. For each player: ACWR (yesterday), Monotony, Strain, and a trend (mini-chart).
Players without enough history appear separately with an Insufficient data badge (2 complete weeks of data required) rather than a misleading number. If the GPS module is enabled, a GPS load column is added to the table.
A player’s chart
Section titled “A player’s chart”Click a row to open the player’s detail: the weekly ACWR trend (with the 0.8–1.3 reference band), then Monotony and Strain week by week. The Whole team link returns to the ranking, and View daily load switches to the Load tab for that player.
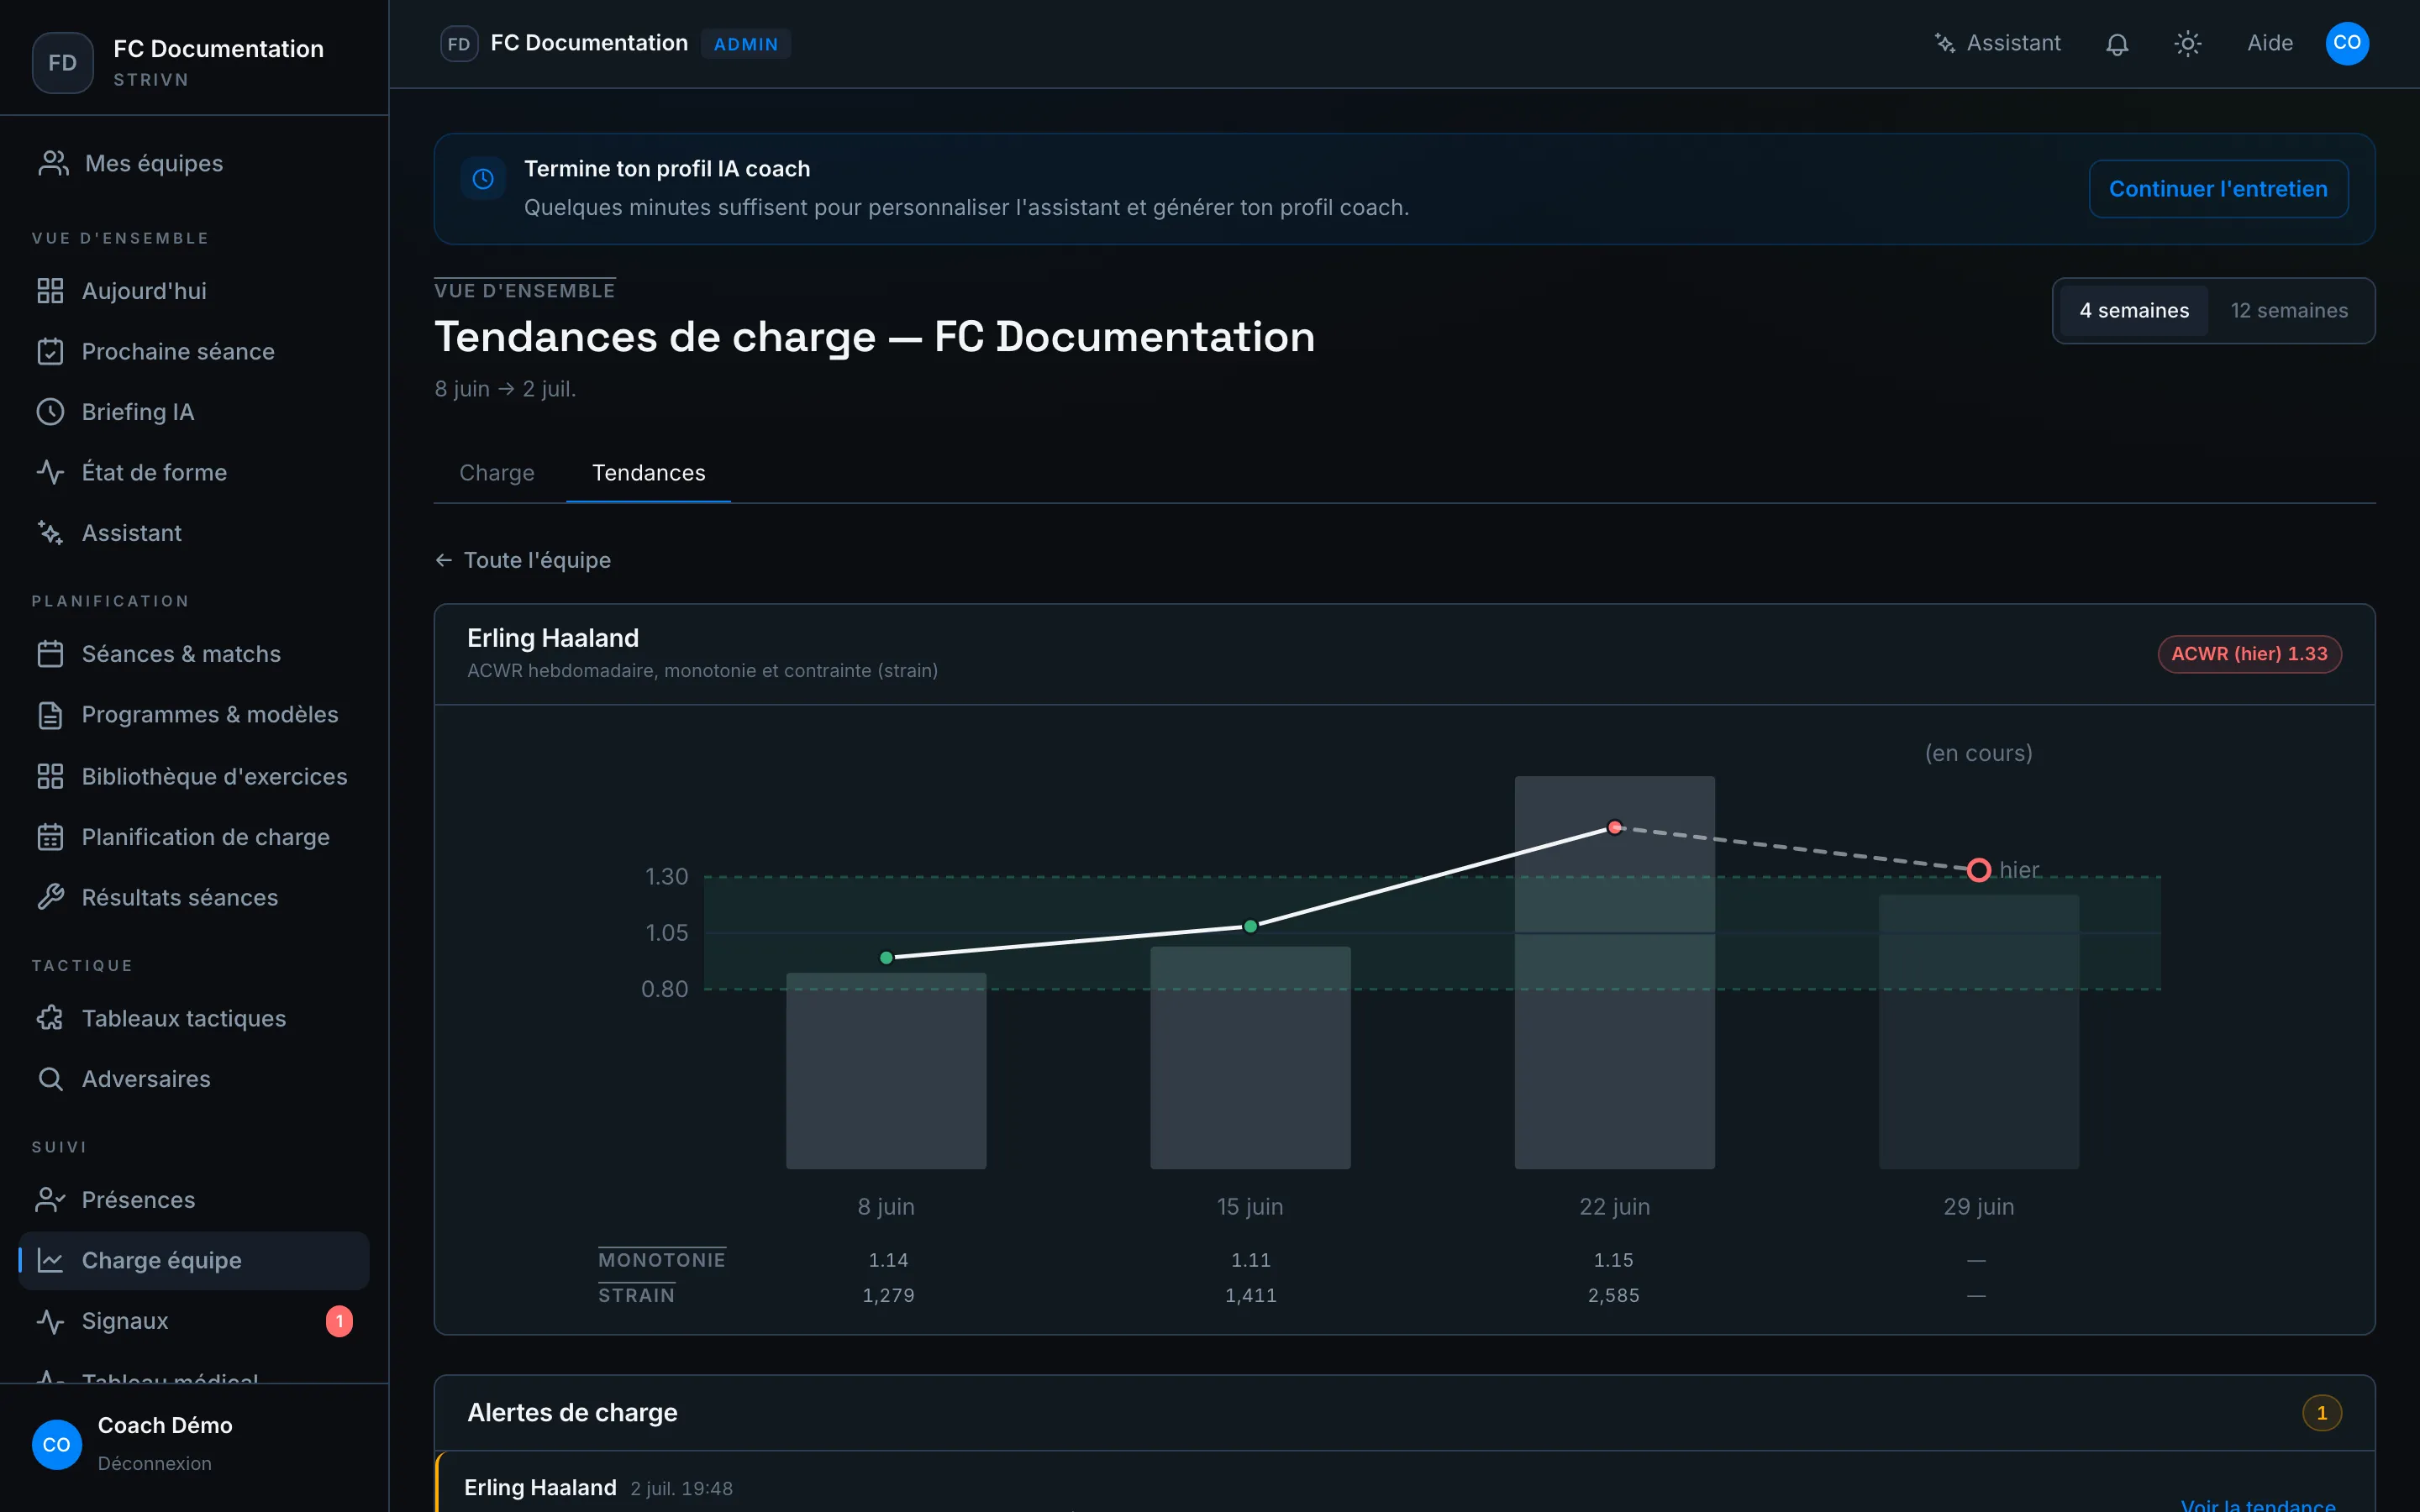
- Monotony: how uniform the load was across the week (mean ÷ daily standard deviation). High monotony combined with high load is a fatigue signal worth watching.
- Strain: total load × monotony — combines volume and lack of variation.
- The current week is marked (in progress) until it’s complete; its values aren’t final yet.
Processing load alerts
Section titled “Processing load alerts”The Load alerts panel lists detected anomalies (unusually high or low load). For each one:
- Click View trend to open the concerned player’s chart.
- Click Acknowledge, add an optional note (context, decision made), then confirm.
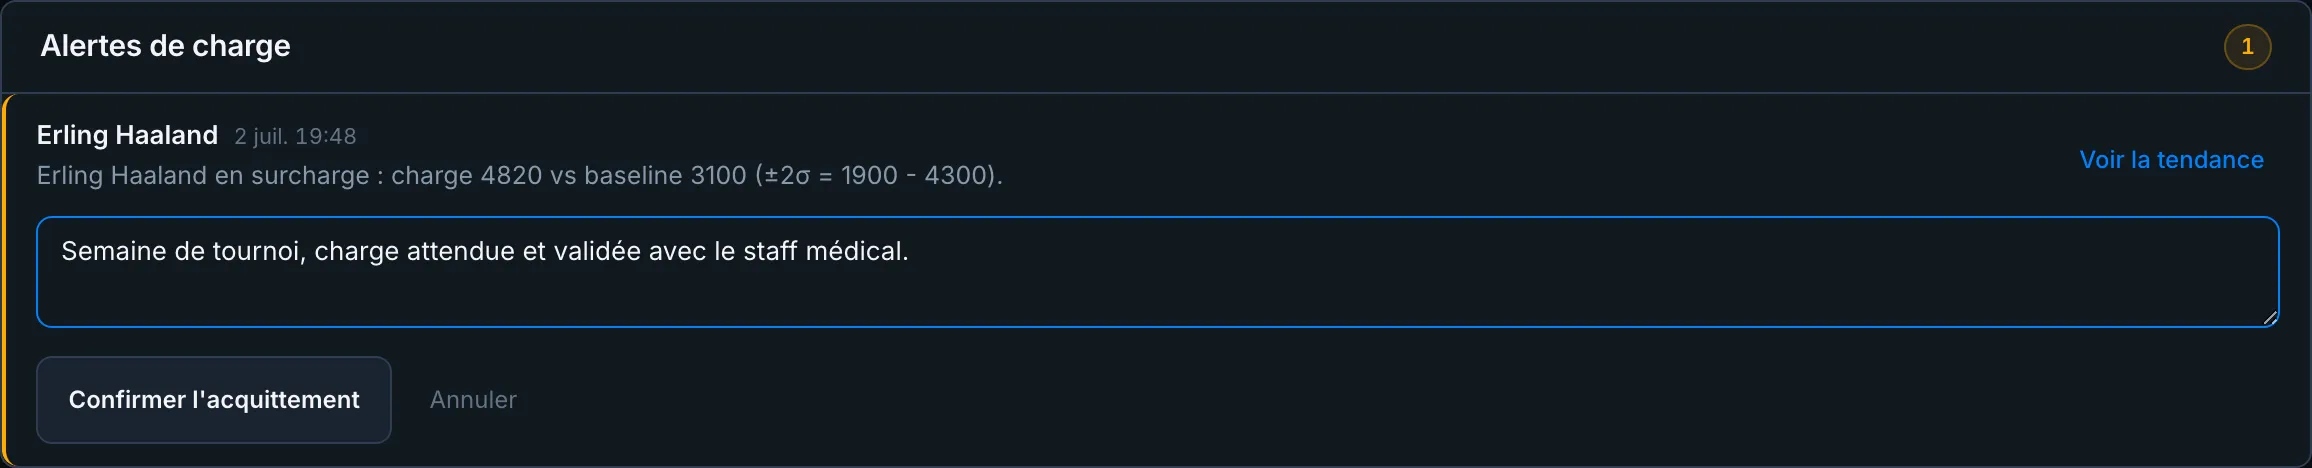
An acknowledged alert stays visible, greyed out, with who handled it and when. It won’t fire again as long as that week’s load stays within range.
What’s next?
Section titled “What’s next?”Load peaks automatically surface in signals & alerts (a player in critical load triggers an alert). From there, adjust the session from the calendar.